
Vampire Bite Halloween Cupcakes Recipe
Introduction
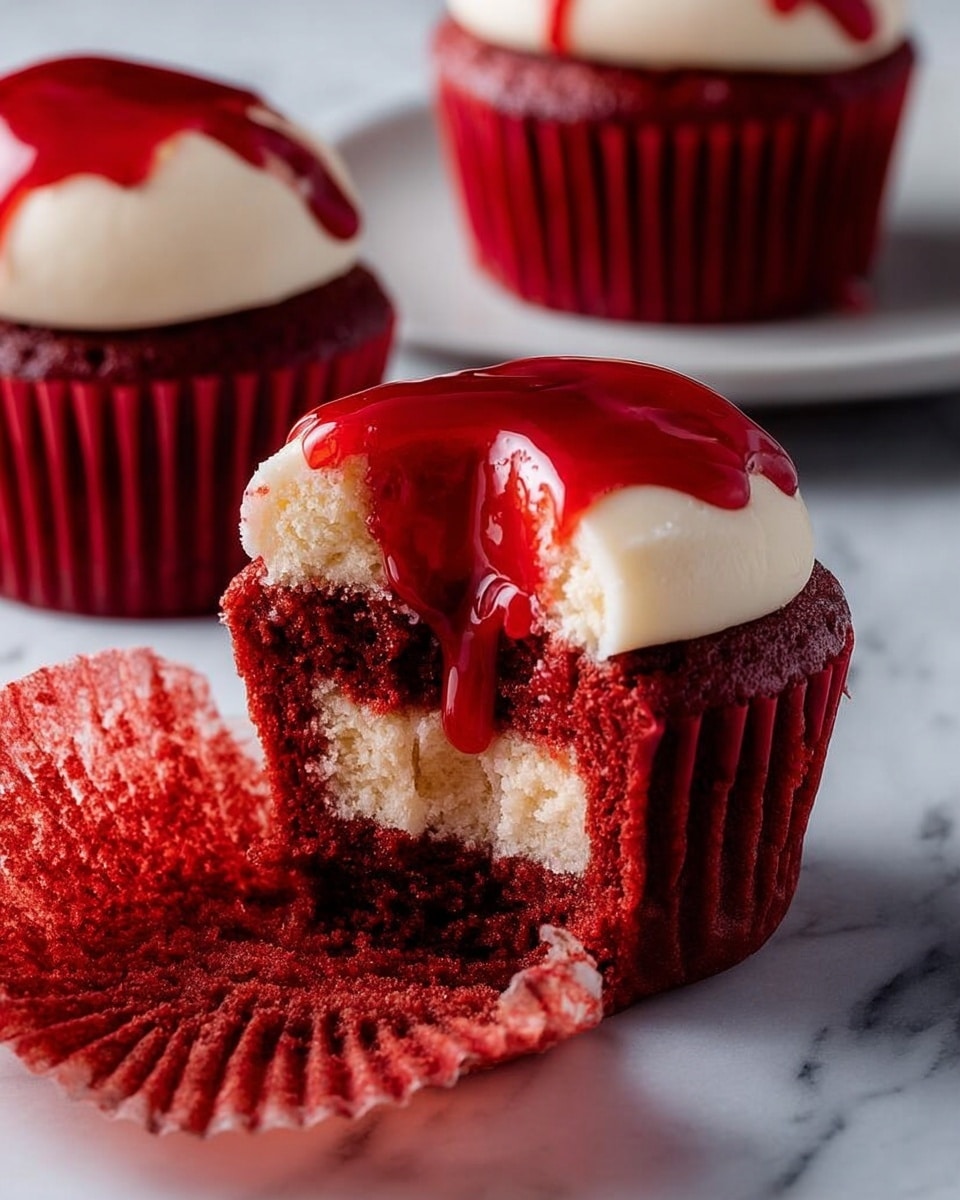
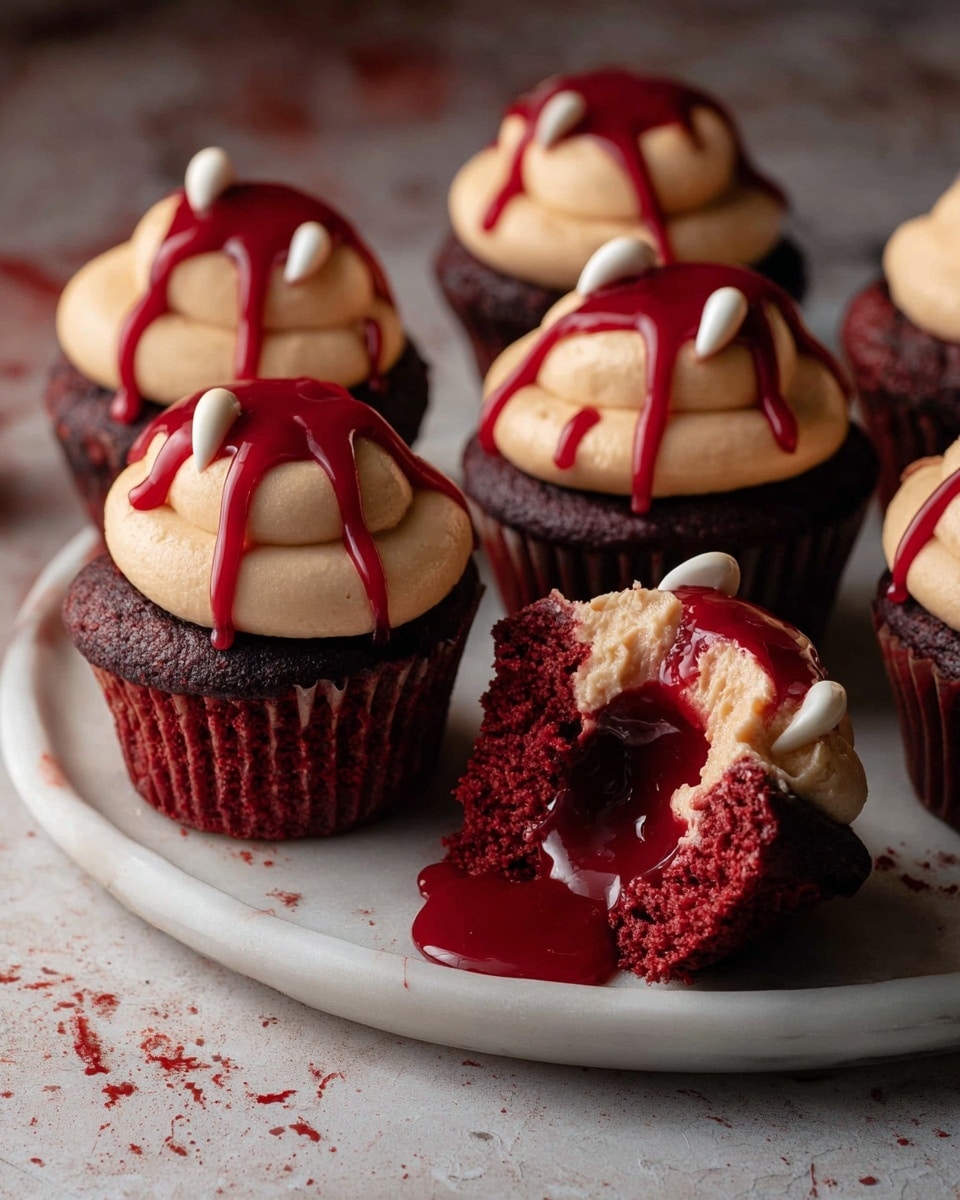
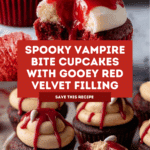
These Vampire Bite Halloween Cupcakes combine moist red velvet cake with a creamy, spilling red filling and pale skin-toned frosting. Finished with spooky vampire bite marks and blood-like drips, they’re perfect for adding a fun and eerie touch to your Halloween celebrations.
Ingredients
- 1 1/2 cups all-purpose flour
- 1 cup granulated sugar
- 1/2 cup unsalted butter, softened
- 2 large eggs
- 1/2 cup buttermilk
- 2 tbsp cocoa powder
- 1 tbsp red food coloring (gel-based for vibrant color)
- 1 tsp vanilla extract
- 1/2 tsp baking soda
- 1 tsp white vinegar
- 1/4 tsp salt
- 1/2 cup red velvet cake crumbs (from the cupcake centers)
- 1/3 cup sweetened condensed milk
- 1 tbsp unsalted butter, melted
- 1-2 tbsp red food coloring (for a vibrant, glossy red hue)
- 1 cup unsalted butter, softened (for frosting)
- 3-4 cups powdered sugar, sifted
- 2-3 tbsp milk or heavy cream
- A few drops of ivory or peach food coloring (adjust for a pale, skin-tone effect)
- 1 tsp vanilla extract (for frosting)
- Candy fangs or small dots of red gelatin (for puncture marks)
- Red syrup or edible red gel (for “blood” drips)
- Straws (optional, for decoration; not edible)
Instructions
- Step 1: Preheat your oven to 350°F (175°C) and line a 12-cup muffin tin with paper liners. In a large mixing bowl, cream together the 1/2 cup softened butter and granulated sugar until light and fluffy, about 2-3 minutes. Add the eggs one at a time, beating well after each addition. Mix in the vanilla extract and red food coloring until the mixture reaches a deep, vibrant red hue.
- Step 2: In a separate bowl, whisk together the all-purpose flour, cocoa powder, and salt. Gradually add the dry ingredients to the wet mixture, alternating with the buttermilk, until just combined. Stir in the baking soda and vinegar mixture to help the cupcakes rise. Spoon the batter into the muffin tin, filling each cup about two-thirds full. Bake for 18-20 minutes or until a toothpick inserted in the center comes out clean. Let cool in the pan for 5 minutes, then transfer to a wire rack to cool completely. Remove paper liners once cooled to reveal the red sides.
- Step 3: To make the creamy red velvet filling, combine the red velvet cake crumbs with sweetened condensed milk and melted butter in a small bowl. Stir until smooth and slightly glossy. Add red food coloring to intensify the color. The filling should be creamy and slightly runny to spill when the cupcake is cut or bitten.
- Step 4: Carefully hollow out the center of each cooled cupcake using a small knife or cupcake corer. Fill each cavity with the red velvet filling until it reaches the top of the hole.
- Step 5: For the skin-tone buttercream frosting, beat the softened butter until creamy. Gradually add sifted powdered sugar, one cup at a time, mixing well after each addition. Add vanilla extract and 2 tablespoons of milk or cream. Beat until smooth and fluffy. Add a few drops of ivory or peach food coloring to achieve a pale, skin-tone appearance. Adjust consistency by adding more milk if needed.
- Step 6: Frost each cupcake with the pale buttercream using an offset spatula or piping bag, aiming for a smooth, even surface that resembles delicate skin. Chill for a few minutes if desired for an ultra-smooth finish.
- Step 7: Create the vampire bite decoration by placing candy fangs or small dots of red gelatin close together on each cupcake’s surface. Drizzle red syrup or edible red gel from the puncture marks to simulate blood drips down the sides. Optionally, use red straws for extra decoration and add drips around the cupcake base on your serving platter to enhance the effect.
- Step 8: Arrange the decorated cupcakes on a dark serving platter. Add extra red syrup drips if desired for an even spookier presentation. Serve with fun Halloween decorations to complete the theme.
Tips & Variations
- Use gel-based red food coloring for a more vibrant and intense color in the cupcake batter and filling.
- Gently hollow out cupcake centers to prevent cracking or breaking the cupcake.
- Adjust the filling’s consistency by adding more sweetened condensed milk if it feels too thick to spill.
- For a smoother frosting texture, chill the cupcakes after applying frosting before adding decorations.
- Substitute red gelatin dots with small edible red candy or painted white chocolate spots for bite marks.
Storage
Store the cupcakes in an airtight container in the refrigerator for up to 3 days to keep the frosting and filling fresh. Bring to room temperature before serving for the best flavor and texture. If frozen, thaw overnight in the refrigerator and allow to warm slightly before serving. Avoid storing for extended periods as the frosting and filling texture may change.
How to Serve
Serve this delicious recipe with your favorite sides.
FAQs
Can I make these cupcakes ahead of time?
Yes, you can bake and fill the cupcakes a day in advance. Frost and decorate them the same day you plan to serve for optimal freshness and presentation.
What if I don’t have buttermilk?
You can substitute buttermilk by adding 1/2 tablespoon of white vinegar or lemon juice to 1/2 cup of milk. Let it sit for 5 minutes before using in the recipe.
Print
Vampire Bite Halloween Cupcakes Recipe
- Total Time: 40 minutes
- Yield: 12 cupcakes 1x
Description
These Vampire Bite Halloween Cupcakes are a spooky and delicious treat perfect for Halloween parties. Featuring deep red velvet cupcakes filled with a creamy, vibrant red filling that spills out like blood, topped with pale skin-tone buttercream frosting and decorated with candy fangs and edible ‘blood’ drips, they are visually striking and irresistibly tasty.
Ingredients
Cupcake Batter
- 1 1/2 cups all-purpose flour
- 1 cup granulated sugar
- 1/2 cup unsalted butter, softened
- 2 large eggs
- 1/2 cup buttermilk
- 2 tbsp cocoa powder
- 1 tbsp red food coloring (gel-based)
- 1 tsp vanilla extract
- 1/2 tsp baking soda
- 1 tsp white vinegar
- 1/4 tsp salt
Filling
- 1/2 cup red velvet cake crumbs (from cupcake centers)
- 1/3 cup sweetened condensed milk
- 1 tbsp unsalted butter, melted
- 1–2 tbsp red food coloring (for vibrant, glossy red hue)
Buttercream Frosting
- 1 cup unsalted butter, softened
- 3–4 cups powdered sugar, sifted
- 2–3 tbsp milk or heavy cream
- A few drops of ivory or peach food coloring (for pale, skin-tone effect)
- 1 tsp vanilla extract
Decorations
- Candy fangs or small dots of red gelatin (for puncture marks)
- Red syrup or edible red gel (for “blood” drips)
- Red straws (non-edible, optional)
Instructions
- Preheat and Prepare: Preheat your oven to 350°F (175°C) and line a 12-cup muffin tin with paper liners. In a large mixing bowl, cream together the softened butter and sugar until light and fluffy, about 2-3 minutes. Add the eggs one at a time, beating well after each addition. Mix in the vanilla extract and red food coloring to achieve a deep, vibrant red hue. Mixing the food coloring early helps ensure an even color.
- Mix and Bake: In a separate bowl, whisk together the flour, cocoa powder, and salt. Gradually add the dry ingredients to the wet mixture, alternating with the buttermilk, mixing until just combined. Stir in the baking soda and vinegar mixture to help the cupcakes rise. Spoon the batter into the muffin tin, filling each cup about 2/3 full. Bake for 18-20 minutes or until a toothpick inserted in the center comes out clean. Let cool in the pan for 5 minutes, then transfer to a wire rack to cool completely. Remove paper liners carefully to reveal the deep red sides.
- Prepare the Creamy Red Velvet Filling: In a small bowl, combine the red velvet cake crumbs with sweetened condensed milk and melted butter. Stir until smooth and slightly glossy. Add red food coloring to reach an intense red. The filling should be creamy but slightly runny to spill out when bitten or cut. Adjust consistency with more condensed milk if needed.
- Hollow Out the Cupcakes: Once cupcakes are fully cooled, use a small knife or cupcake corer to remove a small section from the center of each. Fill each cavity with the creamy red velvet filling so it reaches the top. Be gentle to keep the cupcake intact.
- Make the Skin-Tone Buttercream Frosting: In a large bowl, beat softened butter until creamy. Gradually add powdered sugar, one cup at a time, mixing well after each addition. Stir in vanilla extract and 2 tablespoons of milk or cream. Beat until smooth and fluffy. Add a few drops of ivory or peach food coloring to achieve a pale, skin-tone color. Adjust consistency with more milk or cream if frosting is too stiff.
- Frost the Cupcakes: Using an offset spatula or piping bag, frost each cupcake evenly with the pale buttercream, creating a smooth surface resembling delicate skin. Chill the frosted cupcakes briefly to set the frosting before decorating further.
- Create the Vampire Bite Decoration: Use candy fangs or small drops of red gelatin to make two close-set puncture marks on each cupcake surface. Drizzle red syrup or edible gel from the puncture marks, letting it drip down the sides for a blood effect. Optionally, use red straws as props and add extra drips of red gel around the cupcake base for enhanced vampire vibes.
- Final Touches: Arrange the decorated cupcakes on a dark serving platter surrounded by additional red syrup drips for spooky flair. For added ambiance, serve with Halloween decorations such as plastic bats or candles.
Notes
- Use gel-based food coloring for a more vibrant and concentrated red color without affecting batter consistency.
- Allow cupcakes to cool completely before frosting to avoid melting the buttercream.
- Adjust filling consistency with sweetened condensed milk to ensure it spills out nicely.
- Be gentle when hollowing cupcakes to avoid cracking their structure.
- For a smoother frosting, chill cupcakes briefly before decorating with blood drips.
- Red straws are decorative props only and not edible.
- Prep Time: 20 minutes
- Cook Time: 20 minutes
- Category: Baking
- Method: Baking
- Cuisine: American
Keywords: Vampire Cupcakes, Halloween Cupcakes, Red Velvet Cupcakes, Spooky Desserts, Halloween Party Treats