
Hard Candy Recipe
Introduction
Making hard candy at home is a fun and rewarding project that results in delicious, shiny sweets. With just a few simple ingredients, you can create colorful, flavorful treats perfect for gifts or snacking.
Ingredients
- 1 cup granulated sugar
- ⅓ cup water
- ⅓ cup clear corn syrup
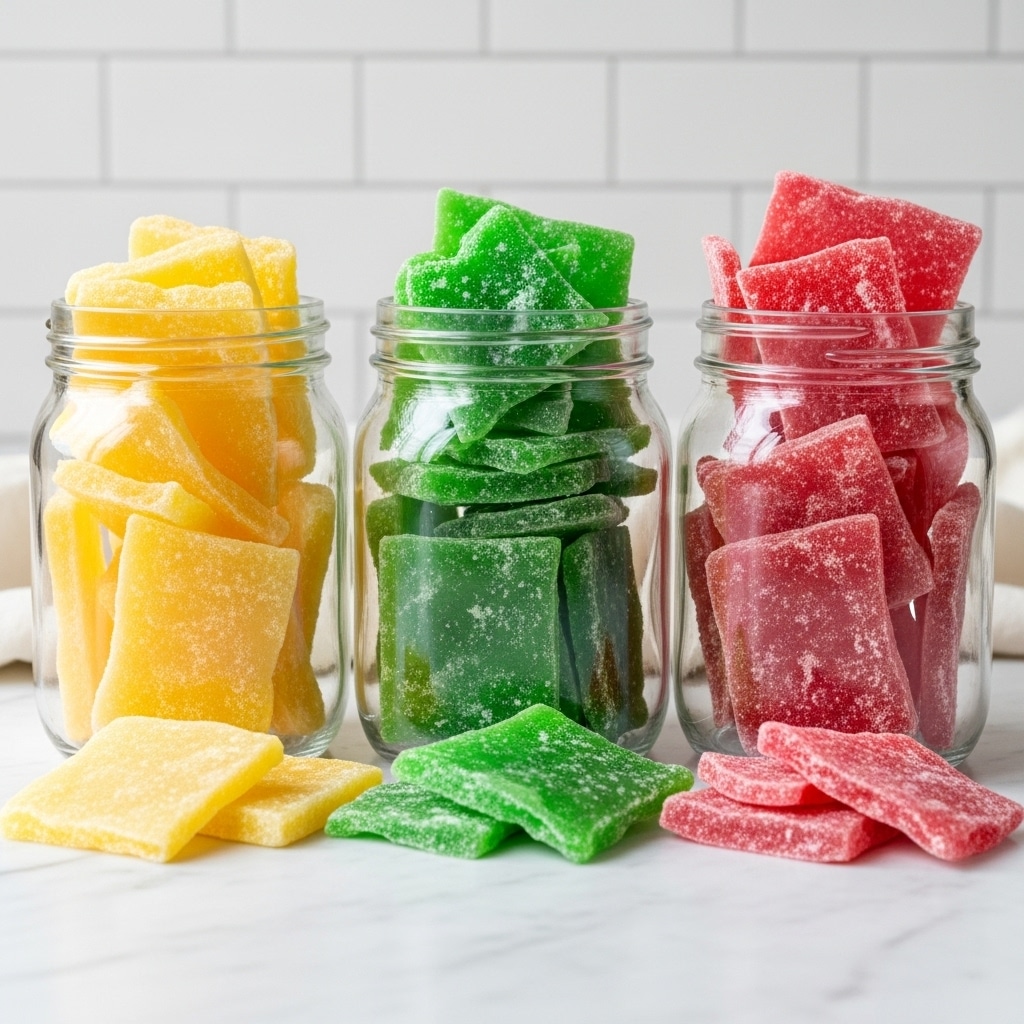
- 42 drops food coloring (liquid works best; for example, 22 drops green, 20 drops red)
- Flavoring: ½ to ¾ teaspoon extract (peppermint, vanilla, etc.) or ¼ teaspoon flavor oil (strawberry, cotton candy, etc.)
- Powdered sugar (for coating)
Instructions
- Step 1: Sift powdered sugar over the bottom of a cookie sheet (a rimmed sheet works best to contain the sugar). Alternatively, you can use parchment paper or a silicone mat. The powdered sugar base prevents the candy from sticking and adds a nice finish. Set aside.
- Step 2: In a medium saucepan, combine granulated sugar, water, and corn syrup. Gently stir until all ingredients are dissolved and no sugar remains stuck to the bottom.
- Step 3: Place the saucepan over medium heat and bring the mixture to a boil.
- Step 4: Let the mixture boil without stirring until it reaches 300°F (hard crack stage) on a candy thermometer.
- Step 5: Remove the saucepan from heat once the mixture reaches 300°F.
- Step 6: Wait 30 seconds, then add the food coloring and your chosen flavoring (extract or oil). Liquid food coloring blends easier than gel.
- Step 7: Stir quickly and thoroughly until the color and flavor are evenly distributed.
- Step 8: Pour the hot mixture onto the prepared cookie sheet. Use an offset spatula to spread it evenly. Work quickly before the candy starts to set.
- Step 9: Sift more powdered sugar evenly over the top of the candy to prevent sticking.
- Step 10: Allow the candy to set for at least 30 minutes or until completely hardened.
- Step 11: Use a pastry brush to remove any excess powdered sugar from the surface.
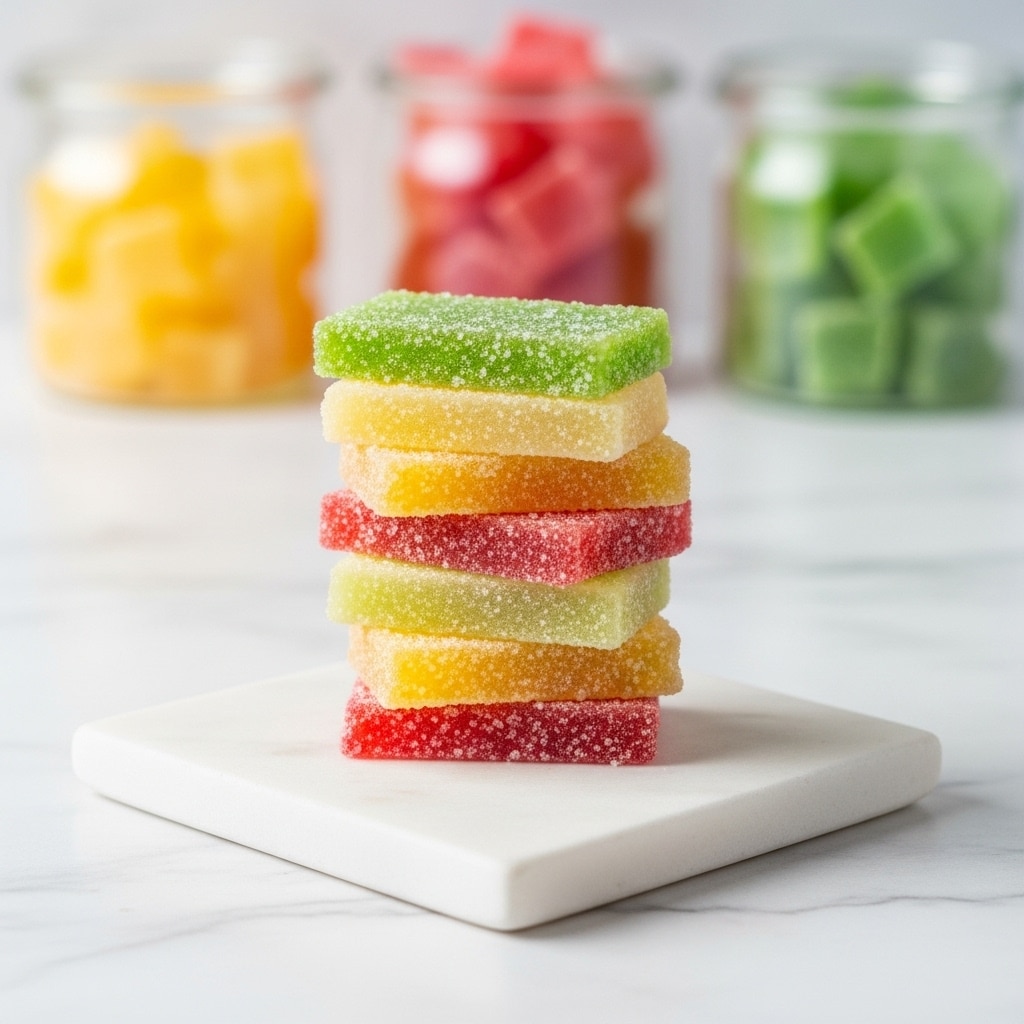
- Step 12: Break the candy into bite-sized pieces using a mallet or rolling pin.
- Step 13: Store the pieces in an airtight container.
Tips & Variations
- Use a candy thermometer for accurate temperature to ensure perfect hard candy texture.
- Replace powdered sugar with cornstarch for coating if you want less sweetness on the surface.
- Experiment with different extracts and oils to create a variety of flavors.
- For a marbled effect, add drops of multiple food coloring after removing from heat and swirl gently before pouring.
Storage
Store the broken candy pieces in an airtight container at room temperature to keep them crisp. Properly stored, hard candy can last several weeks. To refresh slightly sticky candy, separate the pieces and recoat lightly with powdered sugar.
How to Serve
Serve this delicious recipe with your favorite sides.
FAQs
Can I use gel food coloring instead of liquid?
Yes, but liquid food coloring blends more easily. If using gel, add it carefully and mix quickly to avoid uneven coloring.
What if my candy is sticky after cooling?
Sticky candy usually means humidity affected it or it didn’t reach the correct temperature. To fix it, break it into pieces and toss lightly with powdered sugar to reduce stickiness.
Print
Hard Candy Recipe
- Total Time: 45 minutes
- Yield: Approximately 30 bite-sized pieces 1x
Description
This hard candy recipe delivers a classic, glassy, and crunchy sweet treat that can be customized with your favorite flavors and colors. Made primarily from sugar, water, and corn syrup, this candy is boiled to the perfect temperature to achieve that iconic brittle texture. Ideal for festive occasions or just a sweet snack, it’s coated in powdered sugar to prevent sticking and enhance presentation.
Ingredients
Base Ingredients
- 1 cup granulated sugar
- ⅓ cup water
- ⅓ cup clear corn syrup
Color & Flavor
- 42 drops Food coloring (liquid works best; e.g., 22 drops green, 20 drops red)
- Flavoring (extract such as peppermint or vanilla, use ½ to ¾ teaspoon, or flavor oil like strawberry or cotton candy, use ¼ teaspoon)
For Coating
- Powdered sugar (for coating and dusting)
Instructions
- Prepare the base: Sift powdered sugar over the bottom of a rimmed cookie sheet or line it with parchment paper or a silicone mat to prevent sticking. Set aside.
- Mix ingredients: In a medium saucepan, combine granulated sugar, water, and corn syrup. Gently stir just enough to dissolve the sugar and ensure no granules remain at the bottom.
- Boil the mixture: Place the saucepan over medium heat and bring the mixture to a boil. Avoid stirring during this process to prevent crystallization.
- Monitor temperature: Continue boiling until the mixture reaches 300°F (the hard crack stage), which is essential for achieving the hard candy texture.
- Remove from heat: Once at 300°F, take the saucepan off the heat to prevent burning.
- Add coloring and flavor: Wait 30 seconds to allow bubbling to subside, then add your choice of food coloring drops and flavor extract or oil. Use ½ to ¾ teaspoon for extracts and ¼ teaspoon for oils.
- Mix thoroughly: Stir well until the color and flavor are evenly distributed throughout the candy mixture.
- Pour and spread: Quickly pour the hot candy syrup onto the prepared cookie sheet and use an offset spatula to spread it evenly before it starts to set.
- Dust with powdered sugar: Sift a generous layer of powdered sugar evenly over the top to prevent stickiness.
- Let set: Allow the candy to cool and harden completely for at least 30 minutes.
- Brush off excess sugar: Use a pastry brush to gently remove any excess powdered sugar from the surface of the hardened candy.
- Break into pieces: Using a mallet or a similar tool, break the candy into bite-sized pieces.
- Store properly: Keep the candy in an airtight container to maintain freshness and prevent moisture absorption.
Notes
- Use liquid food coloring for smoother color blending rather than gel.
- Be very careful when handling hot sugar syrup to avoid burns.
- Working quickly when pouring and spreading the candy is crucial as it hardens fast.
- The 300°F temperature is critical for the candy to set properly; use a candy thermometer for accuracy.
- Coating the candy with powdered sugar helps reduce stickiness and improves texture.
- For best results, store candy in a cool, dry place in an airtight container.
- Prep Time: 10 minutes
- Cook Time: 15 minutes
- Category: Candy
- Method: Stovetop
- Cuisine: American
Keywords: hard candy, homemade candy, sugar candy, peppermint candy, vanilla candy, easy candy recipe, boiled candy


