
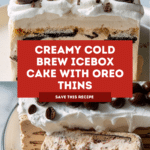
Cold Brew Icebox Cake Recipe
Introduction
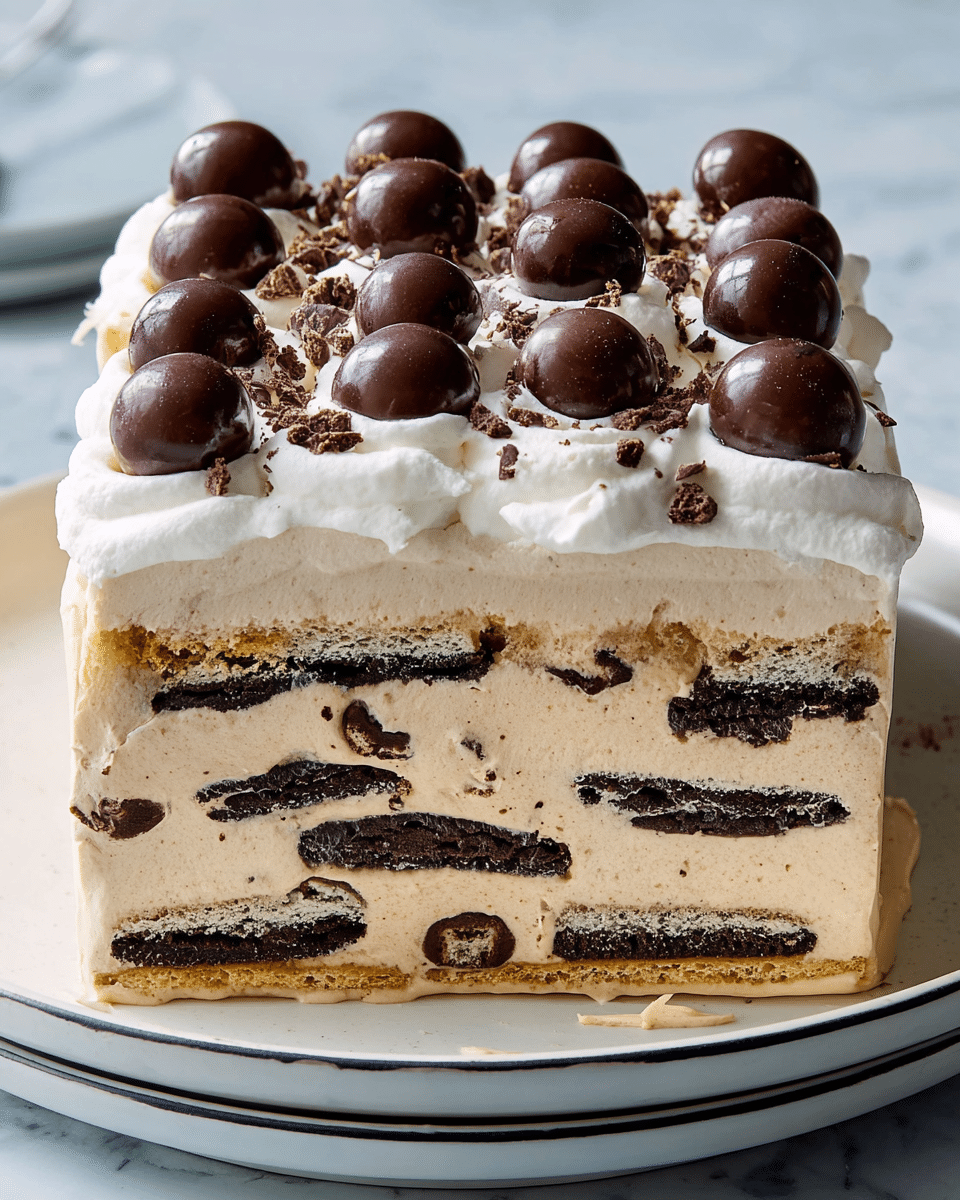
This Cold Brew Icebox Cake is a delightful no-bake dessert that combines rich mascarpone cream with the bold flavors of cold brew and espresso. Layers of crunchy Oreo Thins add texture, making it a perfect treat for coffee lovers looking for an easy yet elegant dessert.
Ingredients
- 16 oz. mascarpone, room temperature (we used Belgioso)
- 1/2 cup cold brew concentrate
- 1 Tbsp. espresso powder
- 1/4 tsp. kosher salt
- 3/4 cup plus 2 Tbsp. confectioners’ sugar, divided
- 2 1/4 cups heavy cream, divided
- 32 Oreo Thins, divided
- 1/4 cup chocolate-covered espresso beans
Instructions
- Step 1: In a large bowl, using a rubber spatula, gently stir mascarpone, cold brew concentrate, espresso powder, salt, and 3/4 cup confectioners’ sugar until smooth.
- Step 2: Switch to a handheld mixer. Gradually beat in 1 1/2 cups heavy cream on medium-low speed, adding in 1/2-cup increments and beating just until incorporated after each addition. Increase speed to medium-high and beat until stiff peaks form, 2 to 4 minutes.
- Step 3: Line an 8 1/2″ x 4 1/2″ loaf pan with plastic wrap, leaving about a 3″ overhang on all sides. Spread 1 cup of the cream mixture into the bottom of the prepared pan. Top with 8 Oreo Thins, arranging in an even 4 x 2 grid. Spread another 1 cup of cream mixture over the Oreos, then repeat layers of Oreo Thins and cream 3 more times, ending with a layer of cream mixture.
- Step 4: Transfer remaining cream mixture to an airtight container and refrigerate. Fold plastic wrap over the top to cover the last layer of cream. Refrigerate at least 12 hours (do not freeze) and up to 3 days.
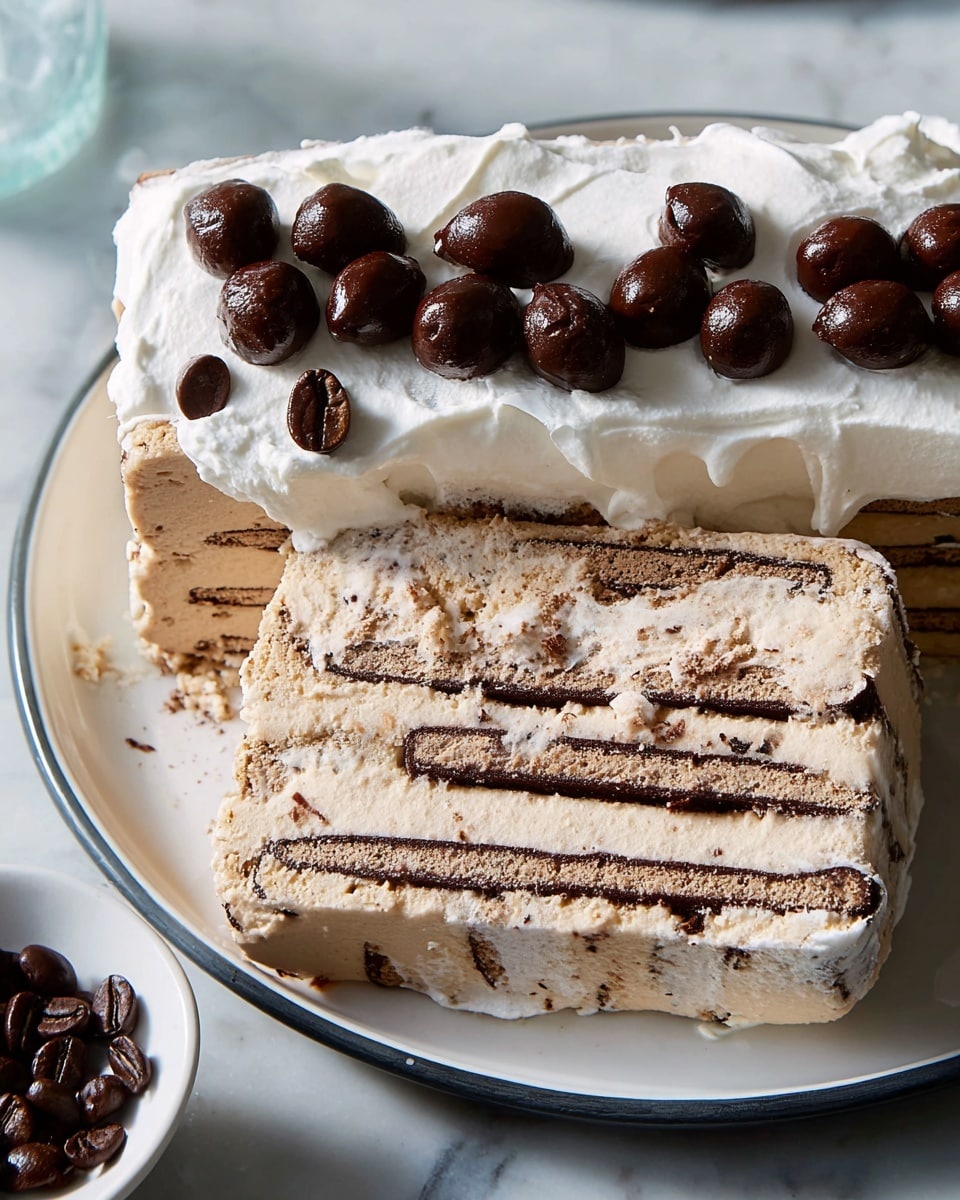
- Step 5: Remove the top layer of plastic wrap from the cake. Place a rectangular platter or large serving plate upside down on top of the loaf pan, then invert the cake onto the platter. Remove the pan and carefully peel off the plastic wrap.
- Step 6: Frost the top and sides of the cake with the reserved cream mixture (you may not use all of it). Refrigerate the cake until ready to serve.
- Step 7: In a large bowl, using a handheld mixer on medium speed, beat the remaining 3/4 cup heavy cream with 2 Tbsp. confectioners’ sugar until stiff peaks form, about 1 to 2 minutes.
- Step 8: Using a spoon, dollop the whipped cream onto the top of the cake, creating irregular peaks and valleys. Sprinkle with chocolate-covered espresso beans before serving.
Tips & Variations
- Use cold brew concentrate with your preferred strength to adjust the coffee flavor intensity.
- For a gluten-free option, substitute Oreo Thins with gluten-free sandwich cookies.
- Chill the mascarpone ahead of time for easier mixing and a smoother texture.
- Decorate with shaved dark chocolate or cocoa powder for an added chocolate touch.
Storage
Store the cake covered in the refrigerator for up to 3 days. Keep the reserved cream mixture airtight to maintain freshness. Reheat is not recommended as this is best enjoyed chilled and fresh.
How to Serve
Serve this delicious recipe with your favorite sides.
FAQs
Can I use regular coffee instead of cold brew concentrate?
Regular coffee can be used, but it should be very strong and cooled completely to avoid making the cream mixture too liquid. Cold brew concentrate provides a smoother, richer coffee flavor.
How long should the cake chill before serving?
The cake needs at least 12 hours in the refrigerator to allow the cookies to soften and the flavors to meld. Chilling longer, up to 3 days, is fine and improves texture.
Print
Cold Brew Icebox Cake Recipe
- Total Time: 12 hours 20 minutes
- Yield: 8 servings 1x
Description
Indulge in a creamy, coffee-infused delight with this Cold Brew Icebox Cake recipe. Layers of mascarpone whipped with cold brew concentrate and espresso powder are combined with crunchy Oreo Thins and chilled to perfection, creating a luscious no-bake dessert that’s perfect for coffee lovers.
Ingredients
Mascarpone Mixture
- 16 oz. mascarpone, room temperature (Belgioso recommended)
- 1/2 cup cold brew concentrate
- 1 Tbsp. espresso powder
- 1/4 tsp. kosher salt
- 3/4 cup confectioners’ sugar
Whipped Cream
- 2 1/4 cups heavy cream, divided
- 2 Tbsp. confectioners’ sugar, divided
Other Ingredients
- 32 Oreo Thins
- 1/4 cup chocolate-covered espresso beans
Instructions
- Prepare mascarpone mixture: In a large bowl, gently stir together mascarpone, cold brew concentrate, espresso powder, kosher salt, and 3/4 cup confectioners’ sugar using a rubber spatula until the mixture is smooth and well combined, creating a rich coffee-flavored base.
- Whip cream into mascarpone: Switch to a handheld mixer and gradually beat in 1 1/2 cups of the heavy cream on medium-low speed. Add the cream in 1/2-cup increments, beating just until incorporated after each addition. Then increase the mixer speed to medium-high and whip until stiff peaks form, about 2 to 4 minutes, creating a fluffy and light texture.
- Assemble layers: Line an 8 1/2″ x 4 1/2″ loaf pan with plastic wrap, leaving about a 3-inch overhang on all sides for easy removal. Spread 1 cup of the cream mixture evenly at the bottom. Place 8 Oreo Thins on top in a 4 x 2 grid. Add another 1 cup layer of cream mixture. Repeat the Oreo and cream layers 3 more times, finishing with a final layer of cream mixture.
- Chill the cake: Transfer any remaining cream mixture to an airtight container and refrigerate for later use. Fold the plastic wrap over the top of the cake to cover it, then refrigerate for at least 12 hours and up to 3 days to let the flavors meld and the Oreos soften slightly.
- Unmold the cake: Remove the top layer of plastic wrap. Place a rectangular platter or large serving plate upside down over the loaf pan, then carefully invert the cake onto the platter. Remove the loaf pan and peel off the plastic wrap gently, revealing the layered cake.
- Frost the cake: Use the reserved cream mixture to frost the top and sides of the cake. You may not need to use it all. Chill the frosted cake in the refrigerator until ready to serve.
- Prepare whipped topping: In a large bowl, beat the remaining 3/4 cup heavy cream and 2 tablespoons confectioners’ sugar with a handheld mixer on medium speed until stiff peaks form, about 1 to 2 minutes, creating a light and airy whipped cream topping.
- Decorate and serve: Spoon dollops of the whipped cream onto the top of the frosted cake, creating irregular peaks and valleys for a rustic appearance. Finally, sprinkle the chocolate-covered espresso beans over the top for a crunchy, coffee-flavored garnish.
Notes
- This is a no-bake dessert; chilling time is essential for texture and flavor development.
- Use high-quality mascarpone and cold brew concentrate for the best coffee flavor.
- Ensure heavy cream is cold before whipping for better volume.
- The cake can be stored in the refrigerator for up to 3 days, but avoid freezing.
- Chocolate-covered espresso beans add crunch and an extra coffee kick; substitute with chocolate chips if preferred.
- Prep Time: 20 minutes
- Cook Time: 0 minutes
- Category: Dessert
- Method: No-Cook
- Cuisine: American
Keywords: Cold Brew, Icebox Cake, No-Bake Dessert, Coffee Dessert, Mascarpone Cake, Oreo Cake


