
Red Velvet Ice Cream Cake Recipe
Introduction
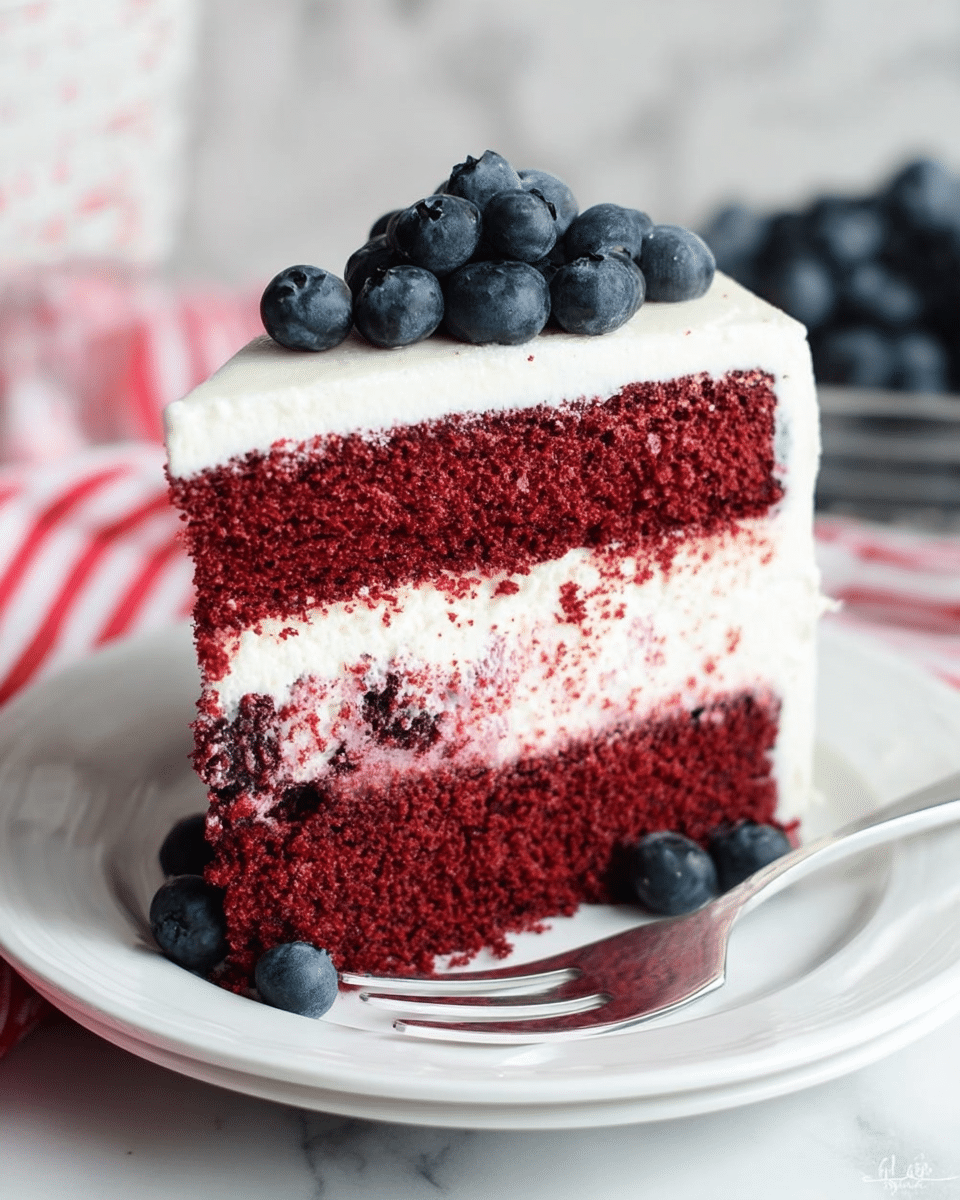
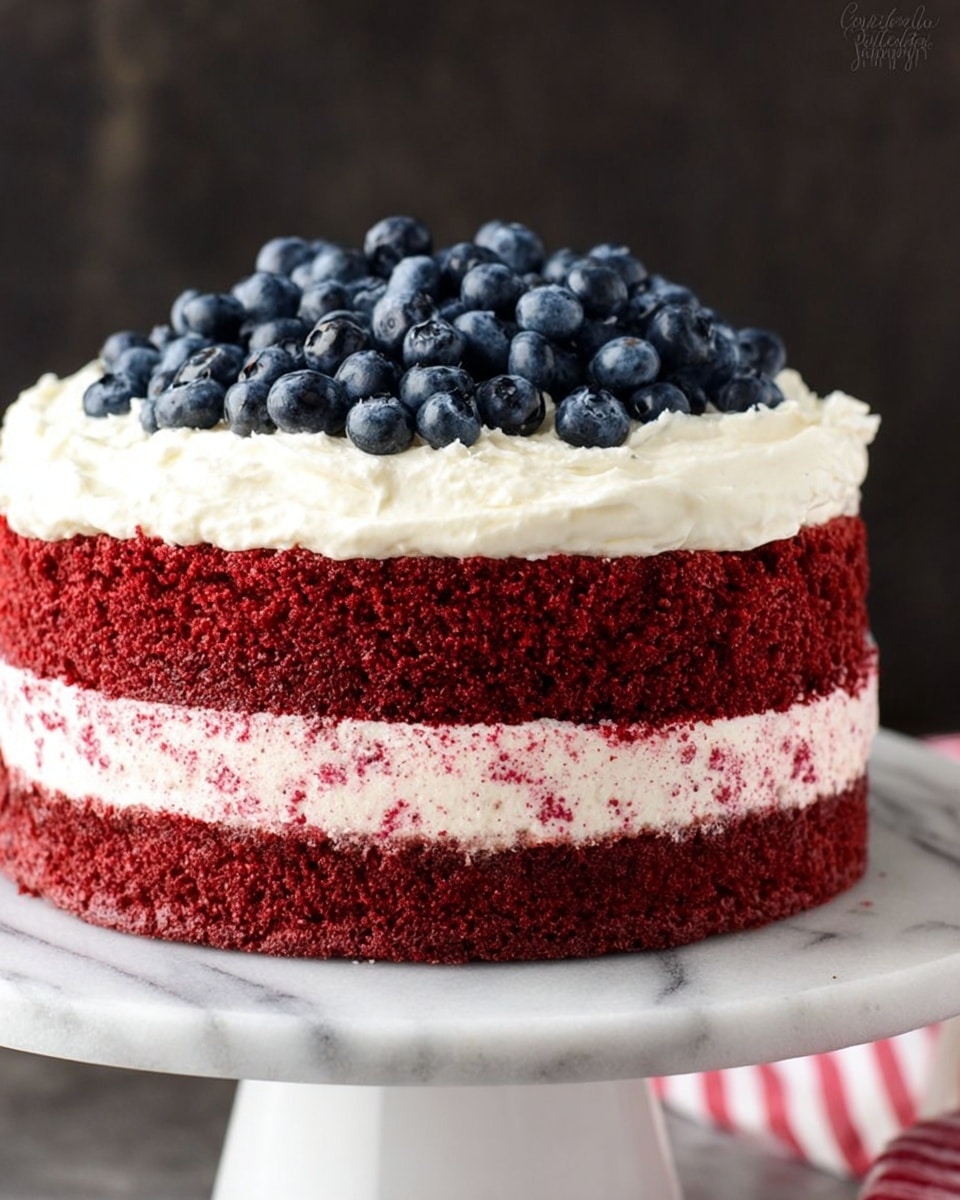
This Red Velvet Ice Cream Cake is a delightful combination of moist red velvet cake layered with creamy, tangy ice cream and topped with fluffy whipped cream and fresh blueberries. It’s a show-stopping dessert perfect for celebrations or any time you want an impressive treat that’s cool and comforting.
Ingredients
- For the cake:
- 1 egg
- 1/2 + 1/8 cup oil
- 1/2 + 1/8 cup buttermilk
- 1/2 tbsp vinegar
- 1/2 tsp vanilla
- 1 oz red food coloring
- 1 1/4 cups flour
- 1 cup sugar
- 1 tbsp cocoa
- 1/2 tsp baking soda
- For the ice cream layer:
- 8 oz cream cheese, room temperature
- 1/2 cup sugar
- 1/8 cup milk
- 1 tsp vanilla extract
- 8 oz Cool Whip (or homemade whipped cream)
- Cake crumbs (from trimming cake tops)
- 12 oz can cream cheese frosting (whipped icing recommended)
- For the topping:
- 3/4 cup heavy whipping cream
- Remainder of cream cheese icing
- 3/4 cup blueberries
Instructions
- Step 1: Preheat the oven to 350°F. Whisk together all wet cake ingredients (egg, oil, buttermilk, vinegar, vanilla, food coloring) in a large bowl until combined. In a separate large bowl, whisk together all dry ingredients (flour, sugar, cocoa, baking soda). Mix wet ingredients into dry on medium-high speed until fully blended.
- Step 2: Pour the batter evenly into two greased and lined 8-inch cake pans. Bake for 19-21 minutes or until a toothpick inserted comes out with a few crumbs. Let cakes cool for a few minutes in pans, then transfer to a wire rack to cool completely.
- Step 3: To make the ice cream layer, combine cream cheese, sugar, milk, and vanilla in a bowl until smooth. Fold in the Cool Whip gently. Trim the rounded tops off the cooled cakes with a serrated knife, crumble these tops, and stir crumbs into the ice cream mixture.
- Step 4: Line the sides of an 8-inch springform pan with parchment paper that extends above the edges. Place one cake layer at the bottom. Spread one-third of the ice cream mixture over the cake evenly.
- Step 5: Spread 1/2 cup of cream cheese frosting on top of the ice cream layer. Then add another third of the ice cream mixture, spreading evenly. Repeat with another 1/2 cup of cream cheese icing, then the final third of ice cream mixture. Smooth the top carefully.
- Step 6: Place the second cake layer on top. Freeze the assembled cake for at least 5-6 hours or overnight until firm.
- Step 7: For the topping, chill a metal bowl and whisk in the freezer for 15-20 minutes. Whip the heavy cream until stiff peaks form, about 5-7 minutes. Gently stir in the remaining cream cheese icing.
- Step 8: Remove the frozen cake from the springform pan and peel off the parchment. Spread the whipped topping over the cake and decorate with blueberries. For freshest berries, add just before serving.
Tips & Variations
- Using an 8-inch springform pan ensures easy removal of the cake once frozen, but if you don’t have one, lining your pan with clear wrap helps lift the cake out.
- Homemade whipped cream can be substituted for Cool Whip in the ice cream mixture for a fresher taste.
- Blueberries can be swapped with raspberries or strawberries for a different fruity twist.
- Allow the cake to soften for about 15 minutes after removing from the freezer before slicing for cleaner cuts.
Storage
Store the ice cream cake in the freezer wrapped or covered to prevent freezer burn. It will keep well for 4-5 days. Before serving, let the cake sit at room temperature for about 15 minutes to soften slightly for easier slicing and better flavor.
How to Serve
Serve this delicious recipe with your favorite sides.
FAQs
Can I make this cake without a springform pan?
Yes. If you don’t have a springform pan, line a regular 8-inch pan with clear wrap before adding parchment and the cake layers. This will allow you to lift the cake out easily once frozen.
What if I don’t have cream cheese frosting?
You can whip together softened cream cheese with powdered sugar and a bit of vanilla to create a quick cream cheese frosting. Whip it until light and fluffy for the best texture.
Print
Red Velvet Ice Cream Cake Recipe
- Total Time: 6 hours 45 minutes
- Yield: 8–10 servings 1x
- Diet: Vegetarian
Description
This Red Velvet Ice Cream Cake is a decadent layered dessert combining moist homemade red velvet cake with a creamy, tangy cream cheese ice cream filling. Finished with whipped cream and fresh blueberries, it’s an elegant and delicious treat perfect for special occasions or summer celebrations.
Ingredients
CAKE
- 1 egg
- 5/8 cup (1/2 + 1/8 cup) oil
- 5/8 cup buttermilk
- 1/2 tbsp vinegar
- 1/2 tsp vanilla extract
- 1 oz red food coloring
- 1 1/4 cups all-purpose flour
- 1 cup sugar
- 1 tbsp cocoa powder
- 1/2 tsp baking soda
ICE CREAM
- 8 oz cream cheese, room temperature
- 1/2 cup sugar
- 1/8 cup milk
- 1 tsp vanilla extract
- 8 oz Cool Whip (or homemade whipped cream)
- cake crumbs (from cutting off tops of cakes)
FROSTING
- 12 oz cream cheese frosting (whipped icing recommended)
TOPPING
- 3/4 cup heavy whipping cream
- remainder of cream cheese frosting
- 3/4 cup fresh blueberries
Instructions
- Prepare Wet Ingredients: Whisk together the egg, oil, buttermilk, vinegar, vanilla extract, and red food coloring in a large bowl until completely combined. Set aside.
- Prepare Dry Ingredients: In another large bowl, whisk together the flour, sugar, cocoa powder, and baking soda until evenly mixed.
- Combine Batter: Pour the wet ingredients into the dry ingredients, mixing on medium-high speed until the batter is smooth and fully combined.
- Bake Cakes: Divide the batter evenly into two prepared 8-inch cake pans. Bake at 350°F (175°C) for 19-21 minutes or until a toothpick inserted in the center comes out with a few moist crumbs.
- Cool Cakes: Let the cakes cool in the pans for a few minutes, then transfer to wire racks to cool completely.
- Make Ice Cream Filling: In a bowl, mix cream cheese, sugar, milk, and vanilla extract until smooth. Gently fold in the Cool Whip. Crumble off the rounded tops of the cooled cakes and stir the crumbs into the ice cream mixture until well incorporated.
- Prepare Springform Pan: Line the sides of an 8-inch springform pan with parchment paper extending above the rim. Place a cake board or cardboard circle at the bottom if desired.
- Assemble Layers: Place one cake layer at the bottom of the pan. Spread one-third of the ice cream mixture evenly over the cake. Add 1/2 cup cream cheese frosting on top of the ice cream, spreading and working it lightly into the ice cream layer. Repeat this layering using another third of the ice cream, 1/2 cup frosting, then the remaining ice cream, smoothing the top.
- Add Second Cake Layer: Place the second cake layer on top of the ice cream mixture layers.
- Freeze Cake: Freeze the assembled cake for 5-6 hours or overnight until firm.
- Remove from Pan: Once frozen, remove the sides of the springform pan and peel away the parchment paper from the cake edges.
- Prepare Whipped Topping: Chill a metal bowl and whisk in the freezer for 15-20 minutes. Whip the heavy cream in the cold bowl until stiff peaks form (about 5-7 minutes). Stir in the remaining cream cheese frosting until combined.
- Finish Cake: Spread the whipped topping evenly over the top of the frozen cake. Decorate with fresh blueberries. For unfrozen berries, add right before serving.
- Storage and Serving: Store the cake in the freezer for up to 4-5 days. Allow it to sit at room temperature for about 15 minutes before serving to soften slightly.
Notes
- Use an 8-inch springform pan for easier removal and clean edges.
- If you don’t have a springform pan, line a regular pan with clear wrap under the parchment paper to lift out the cake.
- Freeze the cake thoroughly before removing from the pan to maintain its shape.
- For best texture, add blueberries just before serving to keep them fresh and not frozen.
- Allow the cake to soften for 15 minutes at room temperature before slicing for easier serving.
- Prep Time: 25 minutes
- Cook Time: 20 minutes
- Category: Dessert
- Method: Baking
- Cuisine: American
Keywords: red velvet, ice cream cake, cream cheese, dessert, layered cake, homemade ice cream cake, red velvet cake


