
No-Bake Pumpkin Pie Balls Recipe
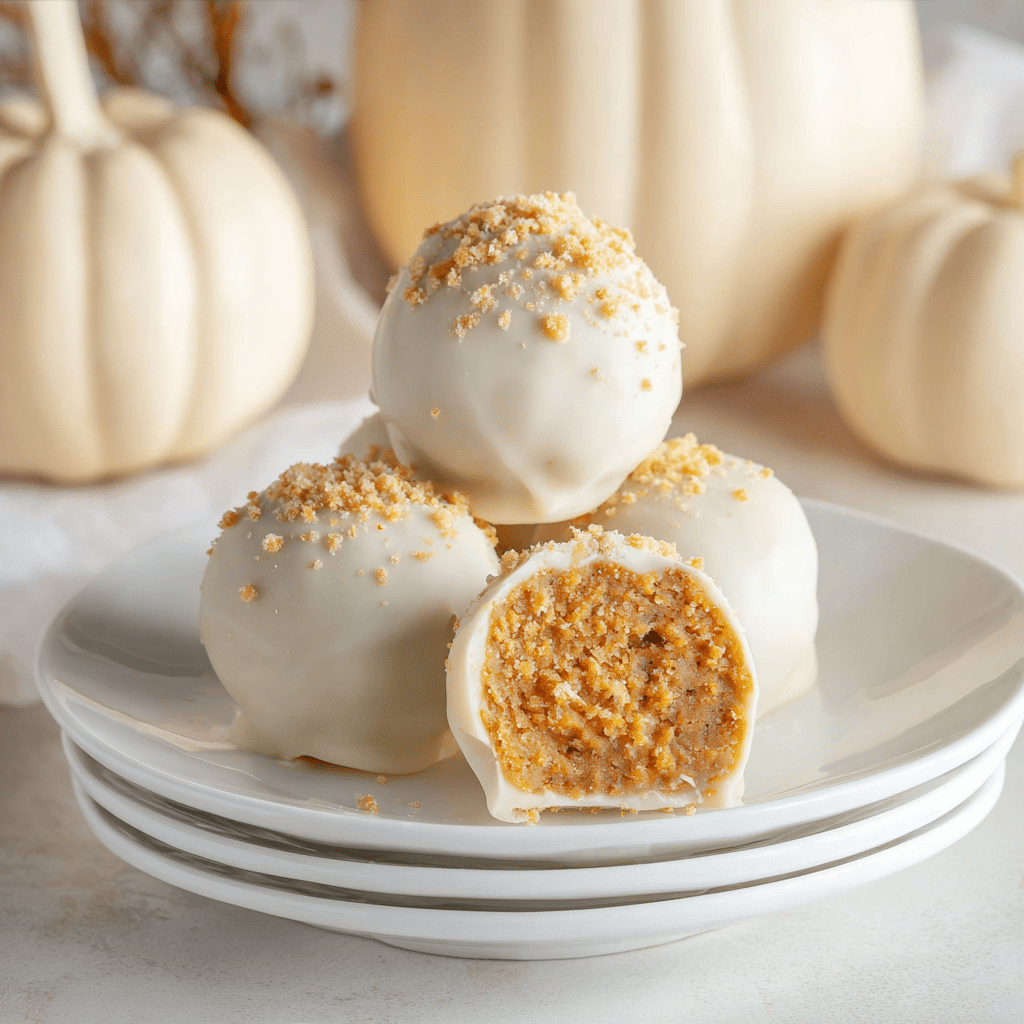
If you love pumpkin pie but are looking for a fun, bite-sized twist on the classic dessert, No-Bake Pumpkin Pie Balls are exactly what you need. These delightful little treats capture all the cozy flavors of pumpkin pie, wrapped in a smooth vanilla candy coating with a crunchy sprinkle of pie crust on top. Perfectly portable and irresistibly rich, No-Bake Pumpkin Pie Balls make dessert time feel like a festive celebration any day of the year.
Ingredients You’ll Need
With just a few simple ingredients, you can create these charming No-Bake Pumpkin Pie Balls that balance creamy pumpkin filling, sweet vanilla coating, and a hint of buttery pie crust. Each component plays an essential role, whether it’s adding texture, flavor, or that beautiful autumnal color.
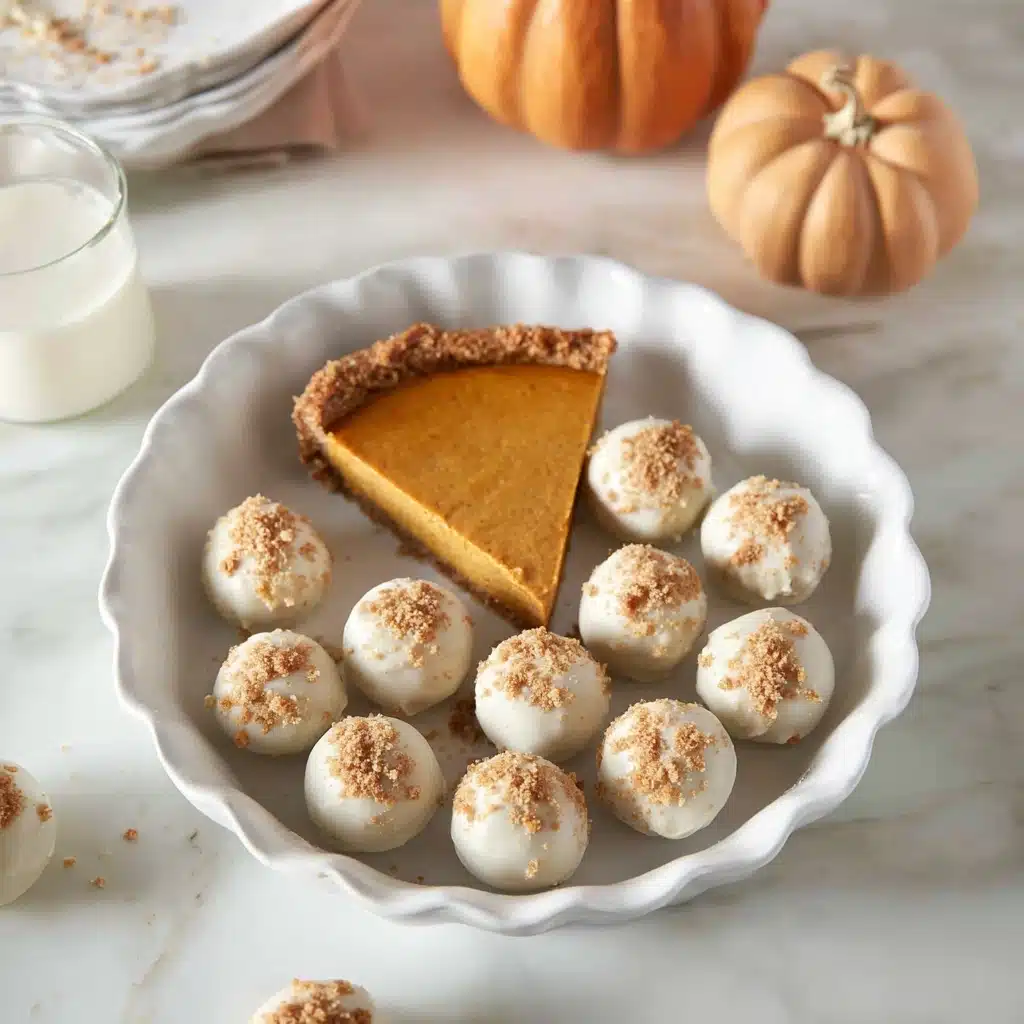
- 1 (9-inch) baked and chilled pumpkin pie: Store-bought or homemade, this is the heart of your pumpkin pie balls, providing that classic spiced pumpkin flavor and smooth filling texture.
- 1 (16-ounce) package vanilla candy coating or almond bark: This creates a luscious shell around each ball, lending sweetness and a satisfying snap when you bite in.
How to Make No-Bake Pumpkin Pie Balls
Step 1: Prepare Your Pie Crust Crumbles
Start by reserving some of the pumpkin pie crust before mixing the filling. These crumbles will add a delightful crunch after coating, giving your No-Bake Pumpkin Pie Balls a perfect contrast between creamy and crisp.
Step 2: Combine Filling and Crust
Break the chilled pie into chunks including both crust and filling. Transfer them to a bowl or the bowl of an electric mixer. On low speed, beat everything together until it forms a moist, cohesive ball of pumpkin goodness. If you don’t have a mixer, no worries — your hands do a fantastic job blending these components gently.
Step 3: Shape the Balls and Chill
Roll the mixture into uniform 2-tablespoon-sized balls. Placing them on a parchment-lined baking sheet prevents sticking and makes cleanup easy. Pop the tray into the freezer for 30 minutes or refrigerate for about 2 hours to firm these up, which helps the coating stick later on.
Step 4: Dip in Vanilla Candy Coating
Melt your vanilla candy coating or almond bark according to package directions until silky smooth. Using a fork, dip each chilled pie ball into the melted coating, turning carefully to cover the entire surface. Let excess coating drip back into the bowl before placing the ball back onto the lined baking sheet.
Step 5: Add the Final Crunch and Set
Immediately after coating, sprinkle some reserved pie crust crumbles on each pie ball. This adds that wonderful texture contrast and visual appeal. Let the candy coating fully set at room temperature or in the fridge before serving to ensure a perfect bite every time.
How to Serve No-Bake Pumpkin Pie Balls
Garnishes
These pumpkin pie balls shine on their own, but a dusting of powdered sugar or a light drizzle of caramel sauce can elevate the presentation. A sprinkle of toasted pecans or chopped walnuts adds extra nuttiness that pairs beautifully with pumpkin.
Side Dishes
Serve No-Bake Pumpkin Pie Balls alongside a scoop of vanilla ice cream or a dollop of whipped cream to balance their richness. They’re also wonderful paired with a hot cup of cinnamon-spiced tea or coffee for cozy gatherings.
Creative Ways to Present
Try arranging the pumpkin pie balls in a festive bowl with autumn leaves for a seasonal centerpiece, or skewer a few on decorative sticks for easy grab-and-go treats at your next holiday party. Wrapping them individually in clear cellophane tied with twine makes charming homemade gifts.
Make Ahead and Storage
Storing Leftovers
Keep your No-Bake Pumpkin Pie Balls in an airtight container in the refrigerator for up to 3 days. This helps maintain the candy coating’s crispness and the luscious texture of the filling.
Freezing
If you want to make these ahead for a special event, they freeze wonderfully! Arrange the balls on a tray until firm, then transfer to a freezer-safe container. They’ll keep well for up to a month. Thaw in the refrigerator before enjoying.
Reheating
Since these treats are meant to be enjoyed chilled, reheating is not necessary. Simply let frozen balls thaw completely in the fridge, and they’ll be ready to enjoy with all their silky pumpkin flavor intact.
FAQs
Can I use homemade pumpkin pie for these balls?
Absolutely! Homemade pumpkin pie works beautifully and lets you control the spices and sweetness exactly to your liking. Just make sure it’s fully baked and chilled before making the No-Bake Pumpkin Pie Balls.
What can I substitute for the vanilla candy coating?
If you can’t find vanilla candy coating or almond bark, white chocolate chips make a great alternative. Just melt gently to avoid burning and dip as directed for a deliciously sweet shell.
Are these pumpkin pie balls gluten-free?
That depends on the pie crust you use. For a gluten-free version, either use a gluten-free pie crust or omit the crust crumbles when sprinkling on top after dipping.
Can I add other flavors to the pumpkin mixture?
Definitely! A pinch of cinnamon, nutmeg, or even a splash of bourbon can add exciting layers of flavor to your pumpkin pie balls. Just keep the texture moist enough to roll into balls.
How long does it take to prepare No-Bake Pumpkin Pie Balls?
Once you have a baked and chilled pumpkin pie ready, assembling these takes about 15 minutes active time, plus chilling for about 30 minutes to 2 hours depending on your preference.
Final Thoughts
No-Bake Pumpkin Pie Balls are a delightful surprise that bring pumpkin pie into bite-sized delights you’ll want to enjoy again and again. They’re simple to make, wonderfully festive, and packed with cozy fall flavors that everyone will love. I can’t wait for you to try them and watch these tiny treats disappear at your next gathering!
No-Bake Pumpkin Pie Balls Recipe
- Total Time: 45 minutes (including chilling time)
- Yield: Approximately 20 pie balls 1x
- Diet: Vegetarian
Description
Delightfully easy and festive, these No-Bake Pumpkin Pie Balls are a perfect bite-sized treat combining the flavors of classic pumpkin pie with a smooth vanilla candy coating. Made using a baked pumpkin pie and coated in creamy vanilla almond bark, these balls are perfect for holiday gatherings or any time you crave a sweet pumpkin dessert without the hassle of baking.
Ingredients
Pie Mixture
- 1 (9-inch) baked and chilled pumpkin pie (store-bought is ideal)
Coating
- 1 (16 ounce) package vanilla candy coating or almond bark
Instructions
- Reserve Pie Crust: Carefully break off some of the pie crust from your baked pumpkin pie and set it aside. These reserved crust pieces will be crumbled on top of the pie balls later for added texture and flavor.
- Prepare Pie Mixture: Break the chilled pumpkin pie, including filling and crust, into chunks and place them in the bowl of an electric mixer. Beat on low speed until the mixture comes together into a moist, cohesive ball. If you don’t have a mixer, you can mix with your hands in a large bowl.
- Form Balls: Using about 2 tablespoons of the mixture per ball, roll the pumpkin pie mixture into small, even-sized balls. Place these balls on a baking sheet lined with parchment paper. Freeze the balls for 30 minutes or refrigerate for 2 hours to firm up.
- Melt Candy Coating: Following the package directions, melt your vanilla candy coating or almond bark in a shallow bowl, being careful not to overheat or burn the coating.
- Coat Pie Balls: Dip each chilled pie ball individually into the melted candy coating. Use a fork to turn and ensure each ball is completely covered. Lift the ball with the fork and allow the excess coating to drip back into the bowl.
- Garnish and Set: Transfer the coated pie ball back onto the parchment-lined sheet. While the coating is still wet, sprinkle generously with the reserved crumbled pie crust. Repeat with remaining balls. Let the coated pie balls rest at room temperature until the candy coating sets completely.
Notes
- For best results, use a fully baked and completely chilled pumpkin pie to create firm balls that hold their shape.
- If you prefer a richer flavor, try using a spice pumpkin pie or adding a sprinkle of cinnamon on top of the candy coating before it sets.
- The reserved pie crust crumbles add a lovely texture contrast; omit only if you want a smoother finish.
- Keep the pie balls refrigerated if not serving immediately as the cream filling may soften at room temperature over time.
- These treats can be stored in an airtight container in the refrigerator for up to 4 days.
- Prep Time: 15 minutes
- Cook Time: 0 minutes
- Category: Dessert, Snack
- Method: No-Bake, Mixing, Dipping
- Cuisine: American
Nutrition
- Serving Size: 1 pie ball (approx. 30g)
- Calories: 120 kcal
- Sugar: 15 g
- Sodium: 90 mg
- Fat: 5 g
- Saturated Fat: 3 g
- Unsaturated Fat: 1.5 g
- Trans Fat: 0 g
- Carbohydrates: 18 g
- Fiber: 1 g
- Protein: 1 g
- Cholesterol: 10 mg
Keywords: pumpkin pie balls, no-bake pumpkin dessert, pumpkin snack, holiday treats, candy coated desserts